Rendering using the batch system
To render your scene from Director, choose Tools > Output > Rendered Frames. The Output Panel appears:

- Click on the All button to render all frames
- Click on the Keys button to render from the first keyframe to the last one (inclusive).
- Otherwise, type in a range of frames:
n | Output frame n |
n | Output frames n |
| Output frames from the start to frame n inclusive |
n | Output frames from frame n to the end inclusive |
- You can make a list of these separated by commas; for example '1-3, 5-' to output all frames except for frame 4.
- Choose Movie to output the scene to file as a movie.
- Choose one of the other devices for direct output.
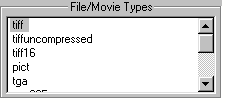
- If you're outputting a file or movie, use the File / Movie Types scrollable list to choose the type of output:
- If you choose one of the TIFF formats, two files are output for each frame: the TIFF file itself, and a small file with a .ali extension. The .ali file contains registration information. If you re-import the image into Director (see Adding a background or overlay), it will be correctly positioned.
- All other devices only support a single type of output, which is automatically used. The list is therefore blank.
- Set the details of the job and its destination:
- If you're outputting a file or movie, set the Output Directory. See Locating a file.
- Set whether or not to output a slate before the scene:
- The Slate Frames sets how many frames of slate there are - if it's output.
- If you're outputting a file or movie, use the Image and Movie Parameters to set the parameters for the output.
- The File / Movie Presets list contains the most common output formats. Clicking on one of these formats sets the correct parameters, assuming your scene is using a TV camera:
- You can use the Image Parameters and Movie Parameters if you need to adjust the preset parameters, or if you need to set parameters for a new non-preset format:
- The output always shows the full width of your scene's camera. If the output's aspect ratio of the does not match the camera's aspect ratio (as set in the Cover Sheet; see The Field Chart and Camera settings), you will get missing or additional rows at the top and bottom of the output.
- The JPEG Quality sets the quality of output formats that use JPEG variable-compression, such as JPEG files, or the various movie formats. The higher the quality, the less the compression. The default quality of 0.8 gives a compression of around 4:1.
- Finally, click on OK. The batch system takes a snapshot of your current scene, and adds the job of rendering it to its queue of waiting jobs.
It may take some time for your job to reach the top of the queue. Meanwhile, you can continue to edit your scene immediately you've submitted the job. It won't affect any later output, because the rendering uses a snapshot of your scene. However, no snapshot is taken of the levels, images and color models that your scene references, as this could potentially use large amounts of disc space; instead, rendering always uses the original versions of these files. So, if you submit a scene for rendering, and then change any of the files it references before the job is output, you will change the output you get.
For details of the batch system, and how to tell when your job is completed, see Using the batch system.


